In the possibility that you do not have WSL enabled by default. I’ve listed a command below that can be run through an elevated PowerShell to enable that environment/program.
wsl –install (If you see WSL help text try and run wsl –list –online)
Enabling WSL Version 2
Restart your computer, sign back into your machine, and open another elevated Powershell prompt. Once open again run the command below.
wsl --set-default-version 2
WSL 2 requires an update to its kernel component. For information please visit https://aka.ms/wsl2kernel.
If you are are promted with the above message. Open this link -> WSL Kernel. Download and install the WSL kernel. Once the kernel is downloaded and installed run wsl --set-default-version 2 again.
Installing your favorite Distro
With Powershell 7 still open in admin mode run the command to change your distro
Run wsl –list –online before the below command so you can decide which distro you want to run virtually on your system.
wsl –install -d <Distribution Name> (Replace with the name of the distribution you would like to install.)
Lately, in technology news, Microsoft has made changes to the Office 365 Navigation Bar in Outlook making some users frustrated. Thankfully, with this post I have a set of steps below to identify the issue and fix it.
Image was captured from Microsoft’s Technet forum
Fixing The Navigation Bar
Here’s a list of steps to fix the navigation bar in Outlook for Office 365.
1. Close Microsoft Outlook 2. Open the Run box with WIN+R and enter outlook.exe /safe 3. Did not find the Outlook toggle – Coming Soon 4. Close the Outlook version running in safe mode 5. Reopen Outlook
Below is a script that I had used to find the version of Micrsoft’s Dot Net Framework software. Sometimes you may not find the install version in control panel and you do have other ways to find it through reg or the properties of a DLL file. Why not do everything through Powershell though
With the script above… You can copy and paste that into a non-administrative Powershell ISE window. As shown below you will see what the script looks like pasted, ran, and what the output should look like
After running the above script and confirming it works for your use. You can then save as and save it under your script collection to run when needed. In my particular case I run this through SCCM on demand when I need to know what the .NET version is for the CAS, DP, MP, CMG, ETC especially when more requirements come out for newer versions.
If you have a vCenter that was dead, removed, or only not in use anymore but was in linked mode, you will receive warnings every time you open the master vCenter, so in this blog post, we will explain how to remove a dead vCenter Linked Mode.
Has we can see in the next image, in one part, we have the warning regarding an old vCenter that is set to linked mode with this vCenter, but in the next, in the Linked vCenter Server Systems tab, we don’t any vCenter added, and the list is empty.
Warnings
In this case, it was an old vCenter that was never removed, and the master was upgraded some times until version 6.7, but always had this dead link attached to it.
Login to your vCenter console to check what links or registers are enabled to this vCenter.
How to remove dead vCenter Linked Mode.
First, we check if this vCenter has an external PSC using: /usr/lib/vmware-vmafd/bin/vmafd-cli get-ls-location –server-name localhost
Next, is to list all the nodes that are register in this vCenter using: /usr/lib/vmware-vmafd/bin/dir-cli nodes list
As we can notice, the vCenter (vcenter.york.local) that we have a warning is still listed in the nodes. So we need to remove that node from the vCenter and break the linked mode between this vCenter and the dead one.
Next, we need to run the command to unregister this vCenter, using: cmsso-util unregister –node-pnid 192.168.2.32 –username [email protected]
Note: Before running this command, beware that this will restart your vCenter services, and vCenter will be unavailable during the process.
[email protected] [ /var/lib/sso-user ]# cmsso-util unregister --node-pnid 192.168.2.32 --username [email protected]
Password:
Solution users, computer account and service endpoints will be unregistered
2021-12-05T16:25:23.263Z Running command: ['/usr/lib/vmware-vmafd/bin/dir-cli', 'service', 'list', '--login', '[email protected]']
2021-12-05T16:25:23.310Z Done running command
Stopping all the services ...
All services stopped.
Starting all the services ...
Started all the services.
Success
[email protected] [ ~ ]#
Check again the vCenter node list and the vCenter is removed.
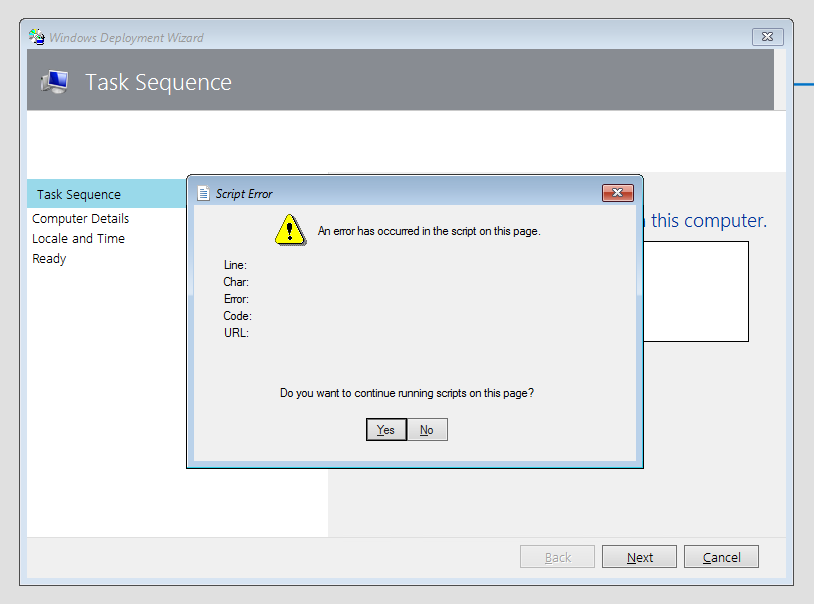
In the midst of attempting to deploy out a new Windows Server 2019 installation I came across a new issue. As mentioned in the title of this quick block. My remote virtual machine posted the error 0xc0000001 which was odd since I was able to PXE call from my onsite domain controller (DC02) and start to load the boot file config.
After some research and a few cups of coffee I found that the resolution to this issue was the Enable Variable Windows Extension. To fix this follow the instructions below… 1. Open your Windows Deployment Services app or WDS 2. Right click on your WDS server in the left pane 3. Left click on Properties 4. Click on the TFTP tab within the properties window 5. Uncheck Enable Variable Windows Extension 6. Lastly Reboot your WDS Server
If you followed all the steps above correctly you should be able to PXE boot your VM from MDT now. Enjoy!
Cloning a virtual machine can come in pretty handy… Especially when you need to troubleshoot or tinker with an existing virtual machine you might just not know enough about or a previous admin didn’t document. All Admins ~ “Please DOCUMENT DOCUMENT DOCUMENT!”. For this article, I’m going to show you step by step on how to create a clone of a virtual machine and disable the virtual NIC.
Accessing The VMware vCenter
Open any browser of your choosing (IE11, Edge, Chrome, Firefox) and enter the vCenter DNS name of your system in the URL bar for the browser.
URL for vCenter
If you’ve enter all the above information correctly. You will be prompted with a Getting Started page. Click on Launch vSphere Client (HTML5). Next, you’ll want to enter the information to access the vCenter administrative console. This section, again, can vary depending on your setup. For my case, I have SSO enabled with a IT Security group. So, I’ll enter in my domain credentials and sign in.
Cloning Virtual Machine
This should be a given but confirm you have enough resources to clone the virtual machine of your choosing or the other hosts in the cluster do.
I chose the Development – SQL19 server I have running in my development vlan. By right clicking on that virtual machine I now have a slew of options, one being the clone option… click on clone. Click Clone to Virtual Machine. You’ll want to select
Select the datastore that best suites your needs or environment.
Check the following boxes: * Customize this virtual machine’s hardware * Power on virtual machine after creation
Disconnect the NIC from the vSwitch by click on the check box next to Network Adapter 1. If you have multiple NIC’s you’ll want to repeat the process.
Lastly, Clicking on the next button in the task above will start to process the cloning of the virtual machine. When the cloning is initiated you’ll see the process below in the Recent Tasks section of vCenter.
Launch the Configuration Manager console, click Software Library, under Application Management right click Applications and click Create Application. Choose Manually specify the application information and click Next.
Building The Application Deployment
Download G’MIC software from here. Once you have downloaded the GIMP software, you can copy it to a folder on the ConfigMgr server or shared folder on a file server (if its in the same DC).
Specify some information about the application. Click Next.
For the Content Location, provide the path where the GIMP setup file is present. In my case I have copied the setup file to a folder named GIMP on SCCM server. The next step is to specify install and uninstall command. Information: Content Location: \dc19\Share\Software\Deployments\Software\GIMP\Plugins Installation Program: “gmic_2.9.6_gimp2.10_win64.exe” /LANG=English /VERYSILENT /NORESTART /SP- Uninstall Program: %AppData%\GIMP\2.10\plug-ins\gmic_gimp_qt\uninst\unins000.exe /VERYSILENT
Detection Method – Detection method allows the administrator to check if the application is already installed. It can also prevent an installation of an application if it conflicts with another application that is already installed. Click Configure rules to detect the presence of this deployment type and click on Add Clause.
On the Detection Rule window, choose Setting Type as Registry. Under HKEY_CURRENT_USER, set the following