In the possibility that you do not have WSL enabled by default. I’ve listed a command below that can be run through an elevated PowerShell to enable that environment/program.
wsl –install (If you see WSL help text try and run wsl –list –online)
Enabling WSL Version 2
Restart your computer, sign back into your machine, and open another elevated Powershell prompt. Once open again run the command below.
wsl --set-default-version 2
WSL 2 requires an update to its kernel component. For information please visit https://aka.ms/wsl2kernel.
If you are are promted with the above message. Open this link -> WSL Kernel. Download and install the WSL kernel. Once the kernel is downloaded and installed run wsl --set-default-version 2 again.
Installing your favorite Distro
With Powershell 7 still open in admin mode run the command to change your distro
Run wsl –list –online before the below command so you can decide which distro you want to run virtually on your system.
wsl –install -d <Distribution Name> (Replace with the name of the distribution you would like to install.)
In this tutorial I will demonstrate how to update Ubuntu for the server version. I will also explain the difference between apt update and apt upgrade, along with a few other things you should know about updates in Ubuntu Linux.
If you are new to Ubuntu or any other Linux operating system, you might be wondering how to update your Ubuntu system for important – security patches, bug fixes and application upgrades.
Updating Ubuntu can be very simple. For a vanilla or fresh installation of Ubuntu its very simple to issue an update command in the command line.
In the terminal, you just have to use the following command:
sudo apt update && sudo apt upgrade -y
Enter your account password
As noted in the code above, you may be asked for a password depending on your permission level. If you are not in “root mode” yet you can use your account’s password to elevate yourself temporarily. You won’t see characters on the screen while typing password in the terminal, so keep on typing your password and hit enter.
That was pretty easy, wasn’t it? Let’s talk about the commands and what they do.
Technically the one line of code is not a single command, it’s a combination of two commands. The && is a way to run multiple commands in Linux in at one time.
The -y in the end automatically enters yes when the command issued asks for your confirmation before installing updates.
Note that you can also use the two commands separately, as seen below, one by one:
Sudo su
Enter Password
Apt-get update
Apt-get upgrade
It will take a little longer, because you have to wait for one command to finish and then enter the second command.
More than just OS updates
Unlike Windows, Linux works with a package manager. When you run the updates, it updates all the packages installed via apt. This means updating Ubuntu will update the core operating system, Linux kernels as well as the applications installed from the software center (if they were apt packages) or installed using apt command.
In this blog I will be showing you how to deploy a Linux – Ubuntu 18.04 LTS ISO through Azure. Since I need to deploy one anyways for a new internal service I will be using called – Ansible Tower. I thought “why not make a blog about this first” and then make another post about my findings regarding Ansible.
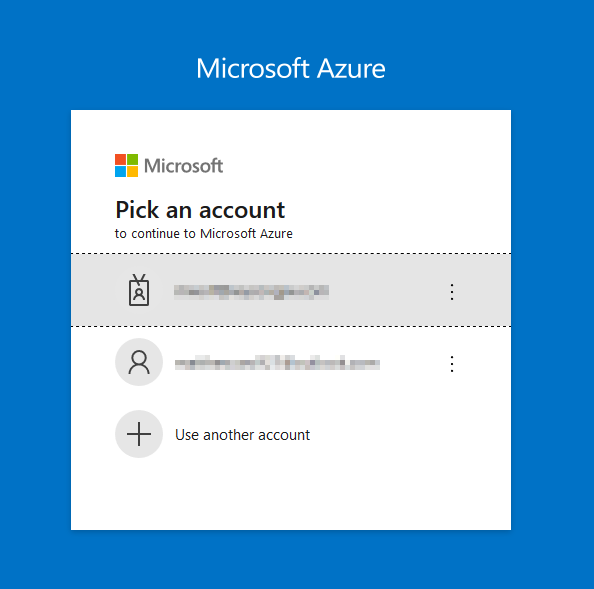
Signing Into The Portal
1. Paying for Azure Usage
Probably one of the most important first steps will be deciding how you are going to be paying for Azure. If you are new to Microsoft Azure ~ click here to read up on my blog post to get free Azure credits. If you already have an Azure account but don’t have credits to use you can also find out the cost to run the virtual machine through the Azure calculator. In most cases, the lower end B-Series VM’s run at most around $20-30 a month but don’t just go on my word. Again check the calculator to see what your estimate will be so that you can properly budget the costs out. If you know that you’ll be using this virtual machine for a period of 1 or 3 years you can opt for those locked in rates to get reduced pricing too.
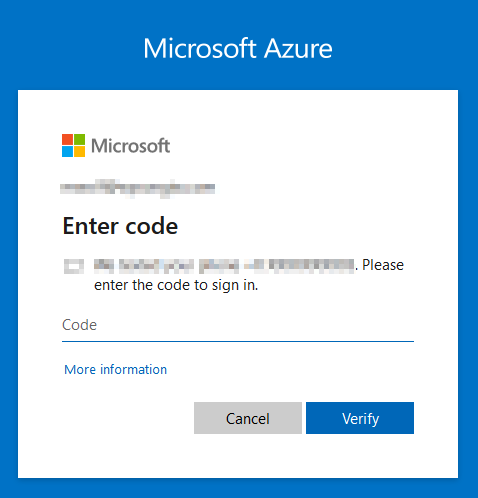
After clicking on the Sign in box. You’ll want to either pick your last used account or sign into another account preferably the one that’s being used with Azure. Hopefully you’ll be using the one that has free credits. If it was already setup during the account creation, you should be prompted for a 2FA whether it be through e-mail, text, or an access token.
Deploying A Linux Machine
1. Creating And Choosing The Resource
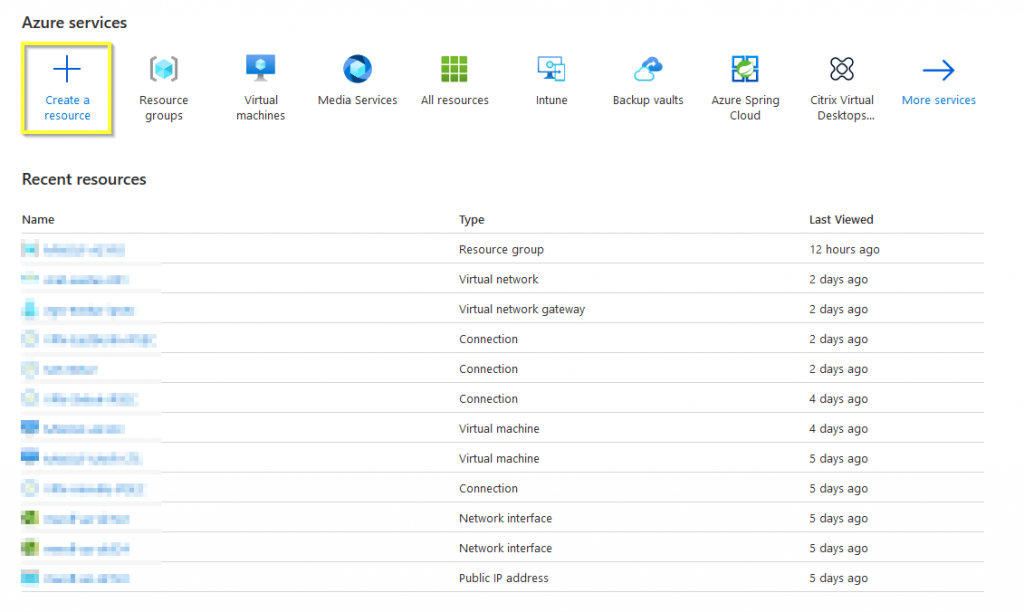
After signing in to the Azure portal. You will be prompted with a pop up window to be given a tutorial of the console. If you’ve just started with Azure I’d recommend that you take the time to run through the guide to get at least an overview of what you are working with. If you decided to skip that for now. Click on the (+) Create a resource button.
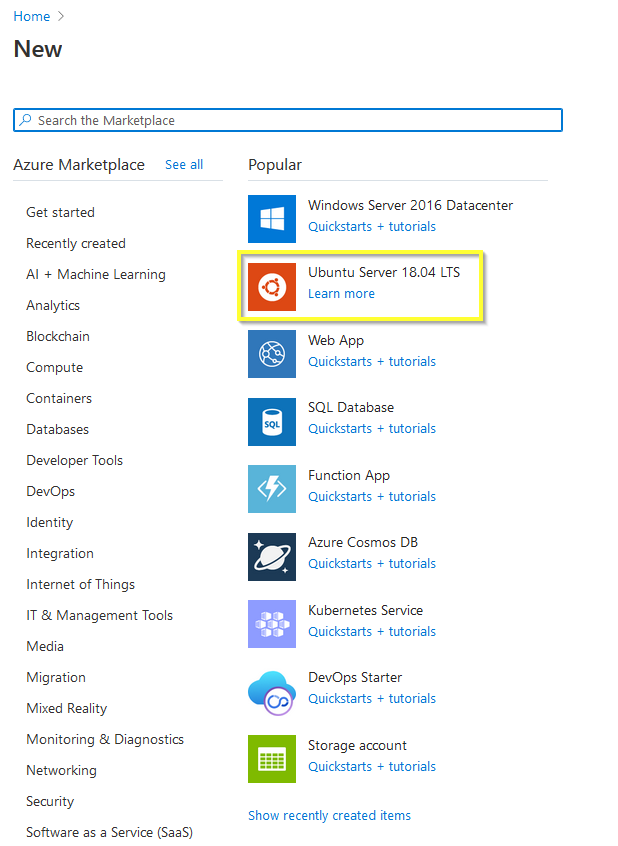
After the above step is completed. In this new menu or catalogue you can choose to run over 300 services of your choice. That’s a lot! However, for this case we will be deploying the common Ubuntu Server 18.04 LTS image.
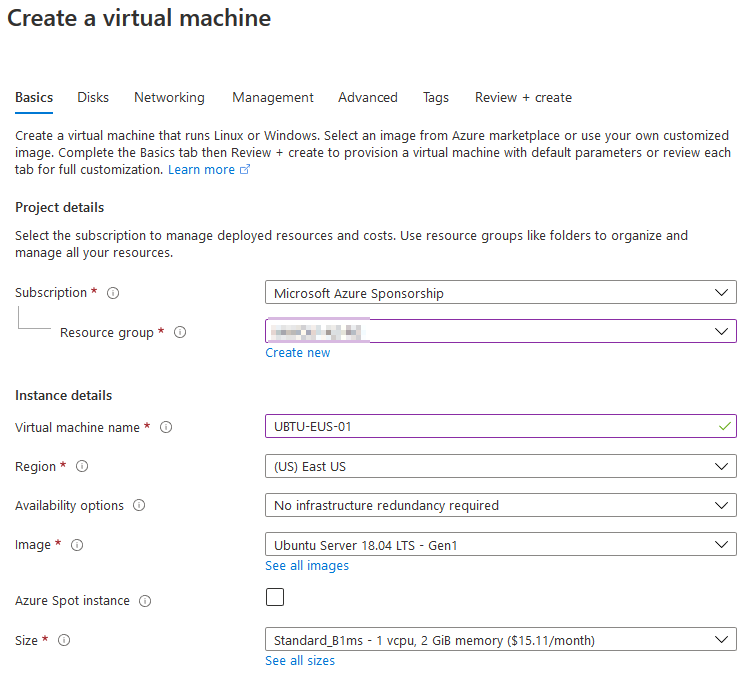
2. The Basics
Couple things we’ll be doing in this section * Choosing the subscription that you want to use: This should only be one * Choose the resource group: You should be creating a new one. For me, I selected a pre-existing one that I have been using. * Give the virtual machine a name: remember to stay within the requirements (this can be found by clicking or hovering over the (i). * Choose the virtual machine region: This is pretty important for a few reasons. Choosing in a region that you are located reduces latency to the machine and can save on costs as some reasons are more expensive than another. * Choose the size of the machine: You don’t have to go with the few options that Microsoft provides when spinning up a virtual machine. You do have options to “see all” or more compute options. Generally speaking the B-series for development/testing or homelab environments are good.
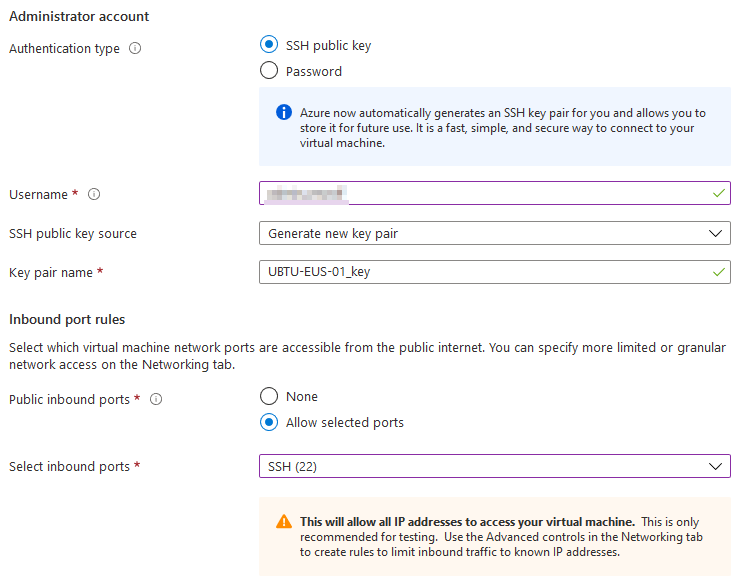
Continue from the last portion * Choose the authentication type: SSH public key’s would be the most secure but you do need to go through extra steps to get that into a readable file for putty – This key is essentially your password. If you don’t want to you can always make a standard password but I would suggest either SSH over a VPN tunnel or isolate SSH to your external IP address. * Username: Setup a good username. Microsoft does cross check username’s with commonly used one’s so you don’t become compromised. * Key source and name: Generate a new key pair and either use the generic name or create your own unique standard name * Port rules: Depending on the existing setup or purpose of the virtual machine you can do a couple of things. For me, I will not be enabling inbound ports since this virtual machine will be traversing my IPSec tunnel. The image below depicts the typical setup.
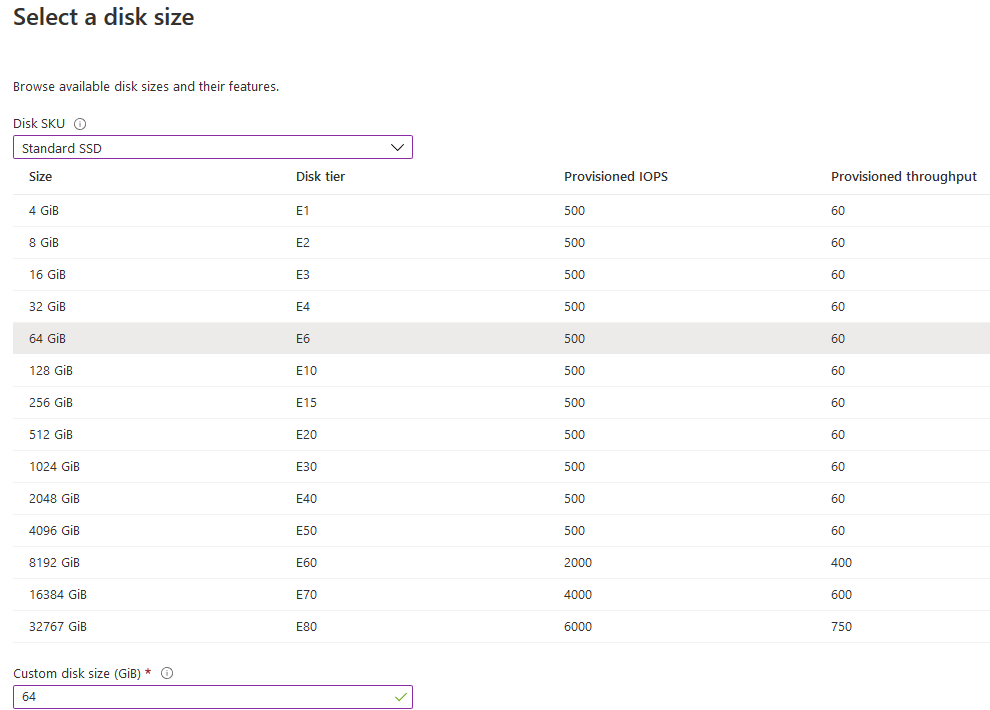
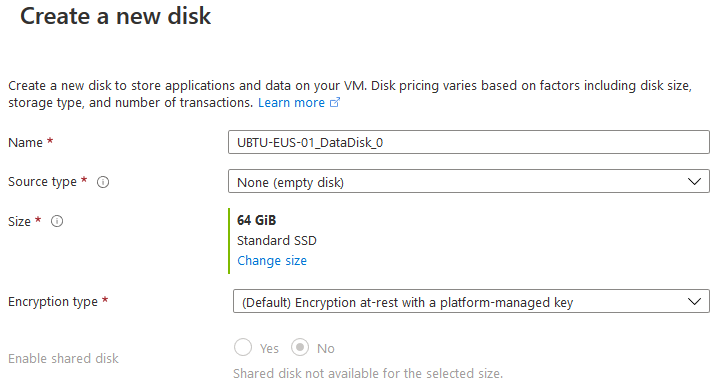
3. Sizing The Disk(s)
Choosing your disk can very depending on your use case. For the amount of cost and use case I typically change the Disk from the standard Premium disk to Standard SSD which is basically fast enough for any of my needs. I also change the disk storage from 1TB to 64GB’s.
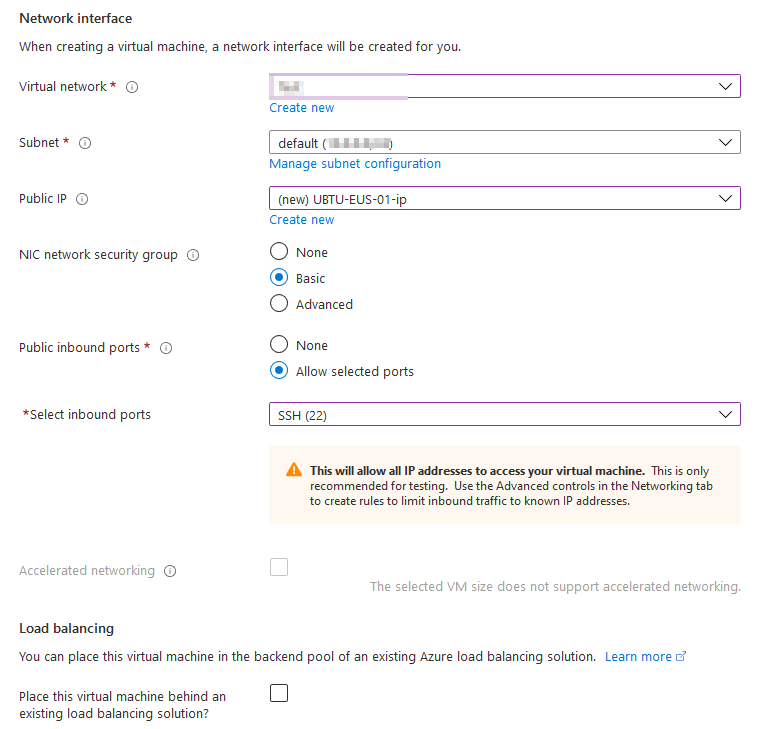
4. Networking The Virtual Machine
Create a virtual network: If you filled in the above sections you should be able to create a new virtual network under your subscription. You also have the ability to use an existing VNET. Subnet: Choose an existing or create a new subnet that the new virtual machine will reside under. This will be the network that is internal or private to your subscription. Public IP: Following the understanding from the previous sections the public IP can be used if you are just creating a new network and don’t have an IPSEC tunnel or you are just settings this up for testing purposes. Leave all the NIC NSG, Public inbound ports, and select inbound ports as is (under the NIC network security group you can restrict access to the WAN IP of your home or business internet connection).
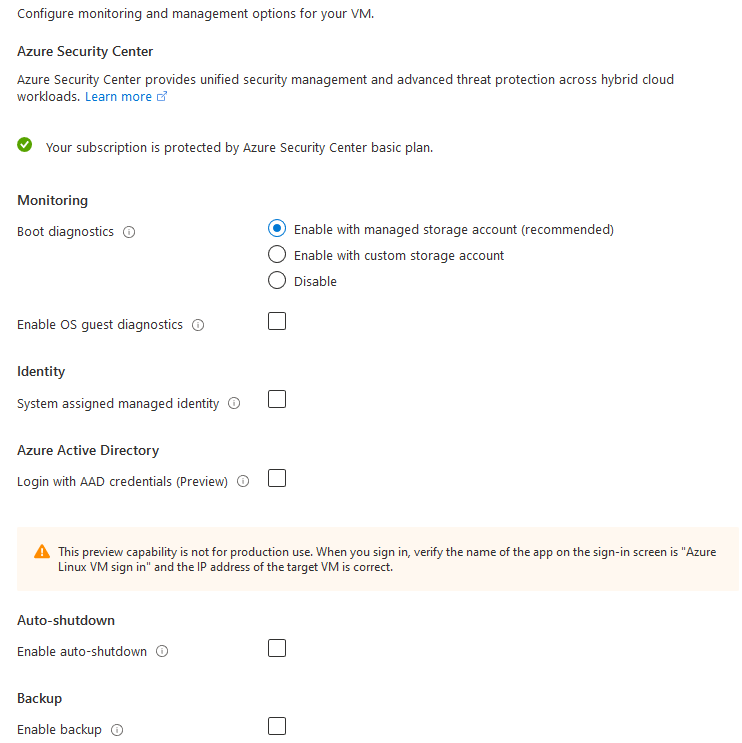
5. Management
For the tenant I have I’ve let these settings as default but they can be changed depending on your circumstances. Enabling Azure Active Directory or AAD would be most beneficial if you have a directory or local directory sync. Enabling auto shutdown will save on your consumption costs too if you are trying to be cost conscious. Another important item to check would probably be the backup function. This can come in handy if you need to instant restore a VM for the last 2 days or restore files for the last 30 days or however long your retention is.
6. Advanced
For this article, I have skipped over all of the Advanced options but feel free to look at them and what those options do.
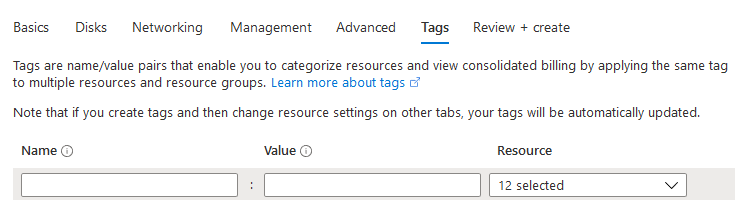
7. Tagging
8. Reviewing The Deployment
You made it! Congrats. Now all you have to do is just double check that all is correct with your deployment and create the VM.